Learn How to Remove Part Of Image With Different Tools
Pictures are like our online language, capable of expressing emotions, narrating stories, and influencing actions. However, even the most compelling images can suffer from distractions or negative aesthetics. Regardless of your skill level, mastering how to remove part of image elements is crucial. In this guide, we'll explore the art of image editing, examining the reasons behind removing certain parts from photos. From removing distractions to enhancing product images for online shopping and boosting social media engagement, we'll provide step-by-step instructions for various techniques. You'll learn about tools, including masks and object removal, and valuable tricks to elevate your photos to a new level.
Contents:
Part 1. Remove Part of Image Online
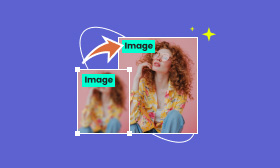
Want to remove parts of the image ruining your awesome photos? Check out Picwand. It's this cool app that uses high-tech AI to get rid of all the distractions. Whether it's an annoying logo, a pesky object, or someone you don't want in your picture, Picwand's smart software can easily remove them, leaving your photos looking clean and professional. No more fighting with complicated photo editing apps or spending ages tweaking your pictures by hand. Picwand's easy-to-use design makes cleaning your photos a breeze. You can turn your photographs into look-good-as-good-as-it-should-be shots with just a few swipes. Let's see how Picwand can boost your photo editing game.
• Picwand is great at easily removing unwanted things from photos, removing distractions, and highlighting your subject.
• It can separate backgrounds perfectly, making your image look neat and professional.
• Picwand also helps adjust your photo settings, like brightness and color, to make your photos look even better.
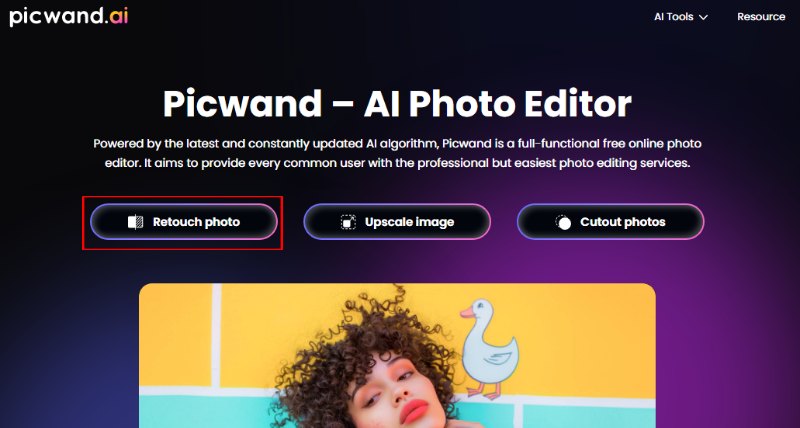
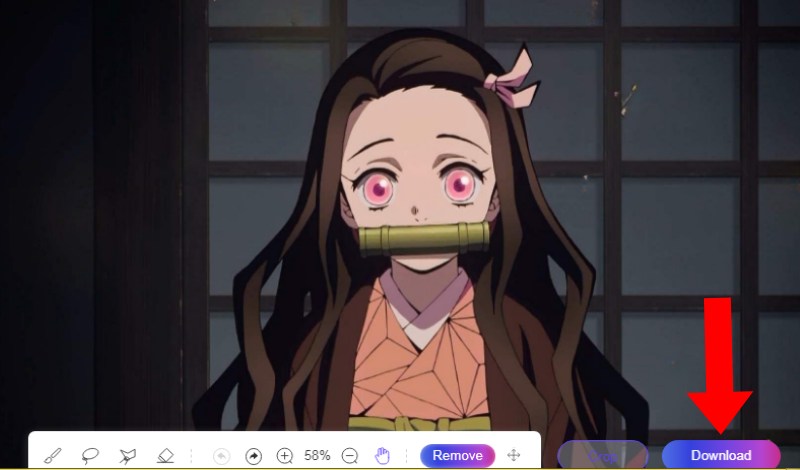
Step 1. Open your browser and launch Picwand on one of your tabs. Once loaded, you will see the main interface and choose the Retouch button.
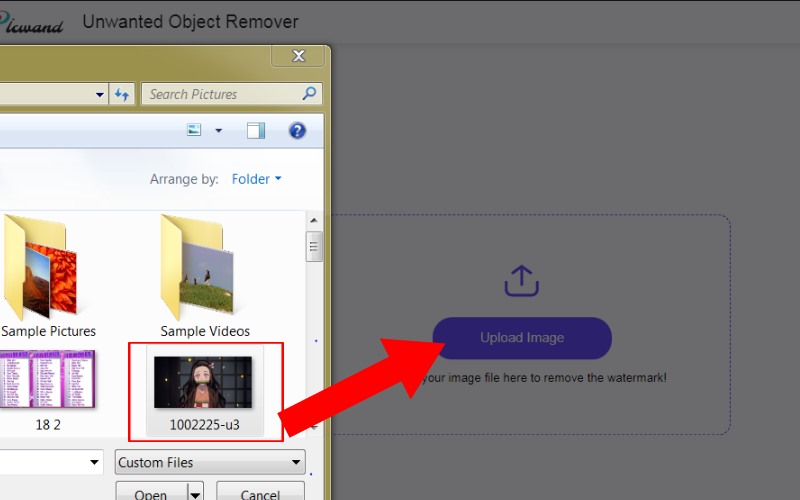
Step 2. Upload your photo by clicking the button labeled Upload Image. Look for the image that you want to edit.
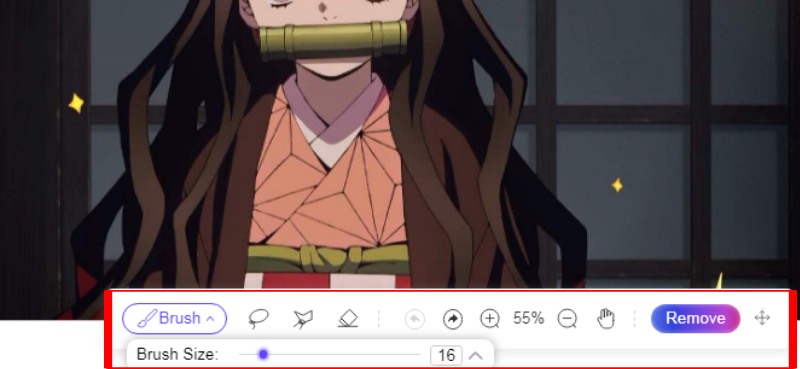
Step 3. You can customize your brush or change the tool with lasso. You can change the size depending on how big the part you want to remove.
Step 4. After that, highlight the parts you want to remove and click the Remove button below.
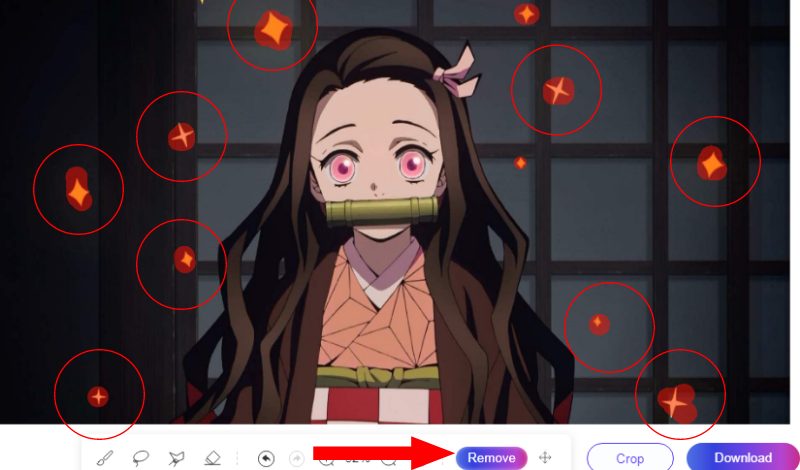
Step 5. Repeat step 3 if necessary until the part is no longer visible. You can download your new photo once you’re happy with the outcome.
Part 2. How to Remove Part of an Image in Photoshop
How can I remove part of an image in Photoshop? Photoshop is the top photo editing program known for its high precision and control in fixing photos. It has many tools and methods to make your images look professional, which online programs can't match. While online tools are faster and easier, Photoshop's advanced features and flexibility attract users who want perfect details and the ability to be creative. You can also use Photoshop to increase image resolution easily.
Pros
- Offers unmatched precision for perfect removal results.
- Offers a broad selection of instruments for different manipulations of images.
- Allows editing without altering the original image through its layer system.
Cons
- Requires advanced learning to its complex features.
- Costs money with a subscription fee.
- Needs high-performance hardware for smooth operation.
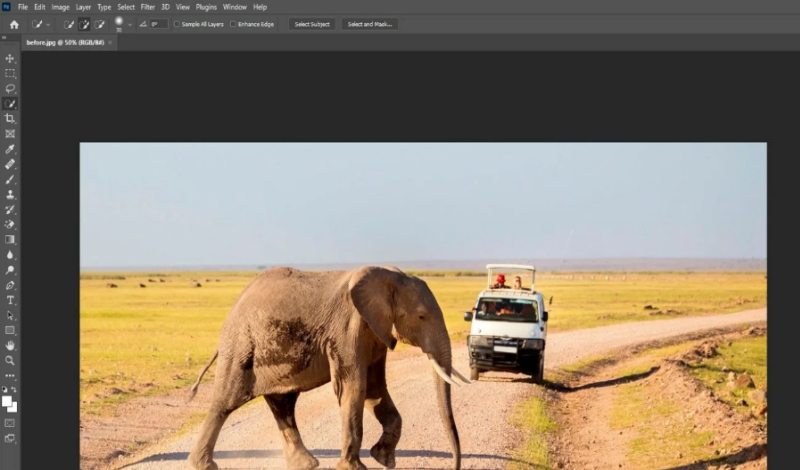
Step 1. Open Adobe Photoshop on your computer. Once the file is open, press the left mouse button next to Open in the File menu to import the picture you wish to modify by deleting individuals or items.
Step 2. Choose the right tool from the Adobe Photoshop toolbar based on what you need to remove. The Lasso tool lets you select things by hand, which is perfect for picking out specific items before using editing tools.
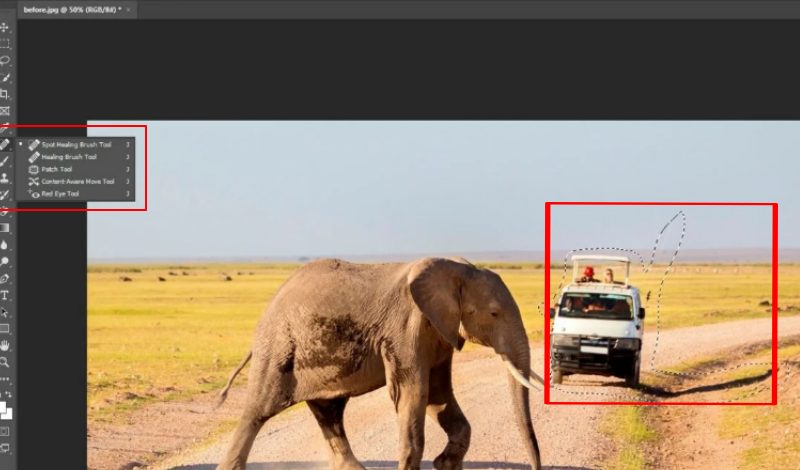
Step 3. In the Options Bar, change the brush size, hardness, and other settings based on your working element. Use the Healing Brush Tool with soft, low-opacity brushes to smooth edge blends. Test and lightly paint the edges for a natural blend.

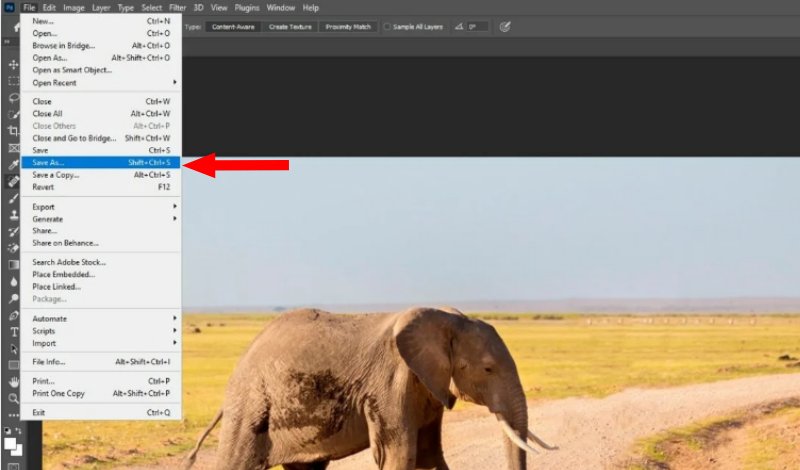
Step 4. Look at the whole image to see if the edited part fits well. Think about saving in different formats and qualities.
Part 3. Canva Remove Part of Image
Canva has made graphic design easier for everyone by offering great design features and easy-to-use editing tools. It's especially good at cleaning up photos by removing unwanted elements. Unlike complicated professional software, it's simple and perfect for anyone, from social media managers to photographers, allowing them to create high-quality designs.
Pros
- Canva removes part of images and is easy to use, even for beginners.
- Quick and straightforward editing.
- Lots of design tools to improve your images.
- Free for basic editing, and you can access your work from anywhere with the internet.
Cons
- Professional software for detailed edits might be more precise.
- Requires internet to use.
- The free version includes watermarks. If you are on the paid plan, it can remove the watermarks.
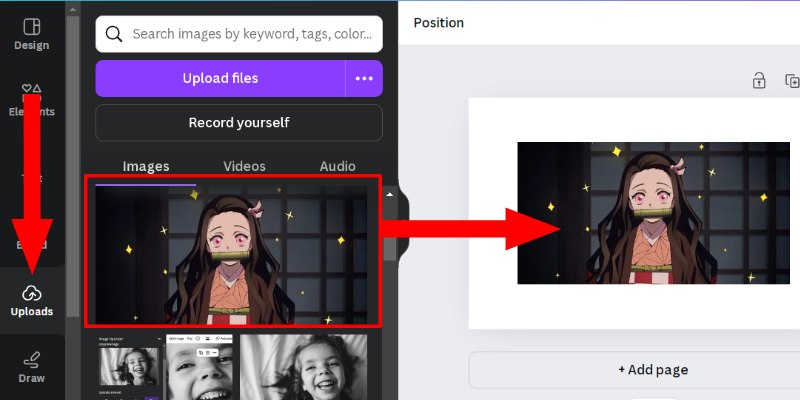
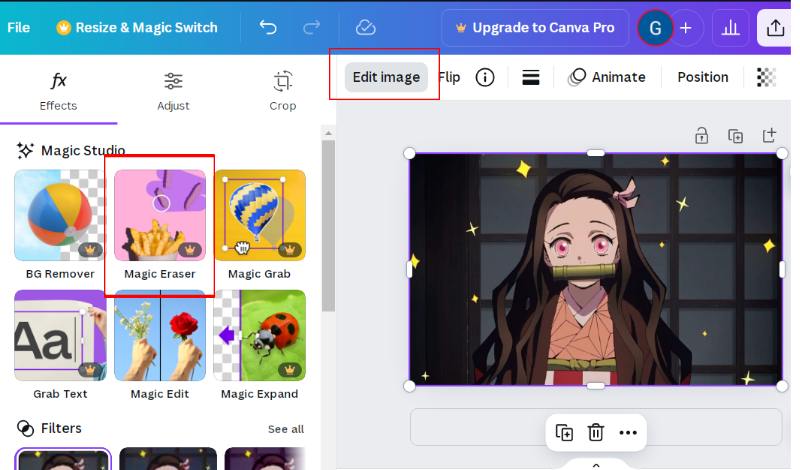
Step 2. Click the image to show the Edit Image button. Then click it. Look for the Magic Eraser tool and tap it to activate it. Highlight the parts you want to remove by holding the mouse's left clicker and hovering over them.
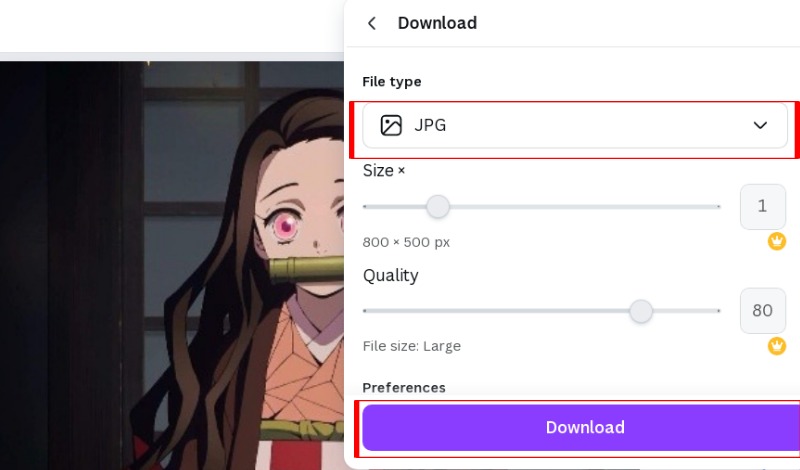
Step 3. Click the share button at the top right corner and scroll down to see Download. You can change the file format and quality by clicking download.
Part 4. Procreate Remove Part of Image
Procreate App removes part of image. This popular digital art and painting app is known for its accuracy, flexibility, and easy-to-use features. It's mainly used for art but also includes strong editing tools for fixing and removing parts of pictures. You can also use it to proceed other advanced features like enlarge JPG and more. Procreate enables you to edit photos using various instruments and levels, providing the capability to produce high-quality artwork.. It's suitable for anyone who wants to turn their ideas into art, including graphic designers, illustrators, and photographers.
Pros
- Precise and detailed editing
- Lots of tools for creative projects and image editing
- Uses layers for safe editing
Cons
- Takes time to learn and master
- Might not have as many features as other software
- Files are usually .procreate only, needing conversions
- Only for iPad and primary is digital art creation
Step 1. Import your image into Procreate. Duplicate the layer to preserve the original.
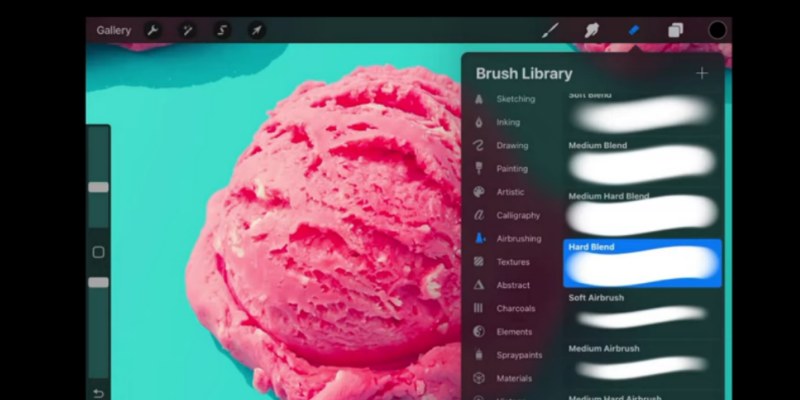
Step 2. Carefully outline the area you want to remove using the selection tool. Procreate offers various selection tools, including lasso, elliptical, and rectangular selections. For more precise edges, refine the selection using the Refine Mask tool.
Step 3. Once you have a satisfactory selection, you can either Erase the unwanted area using the eraser tool or fill the selection with a color or pattern to replace the removed area.
Part 5. FAQs to Remove Part of Image
How can I remove part of a picture?
Picwand is a tool that uses AI to detect photos and correct images. It can be used on your computer or smartphone.
What is the free AI tool for removing people?
Many free AI tools can easily remove people from pictures. Some well-known ones are Picwand, which cleans pictures, and Photoroom. These tools use smart algorithms to find and delete human faces from photos, creating a clear and natural look. However, how well they work can differ based on the complexity of the image.
How do I cut out part of a picture on my iPhone?
Use the Photos app to remove an area from a photo on your iPhone. Here's how: Open the image you want to edit. In the top right, tap Edit. Select Crop. Use the crop handles with your fingers to choose the area you want. Press "Done" to save the edited image.
Summary
Removing parts of image is a frequent task for everyone, from amateurs to pros. The choice of method varies based on the photo's complexity, your goals, and how skilled you are. Online tools and apps with AI help are ideal for easy, quick fixes. On the other hand, for detailed, complex edits, professional tools like Photoshop are better. Regardless of your skill, there's a tool or technique for every need. Try different methods to see what works best for your photo. Remember, practice is key to improvement in photo editing. The more you edit, the more you'll master removing unwanted elements and achieving the desired look.
AI Picwand - Anyone Can be A Magician