A Step-by-Step Guide for PC & Mobile: How to Remove Green Screen in CapCut
The green screen effect is an incredibly powerful technique in video editing. It lets you replace a green background with any image, video, or impact, giving you endless creative possibilities. Teaching you how to remove green screen in CapCut on a PC and mobile can completely transform your work. One of the easiest and most accessible tools for this is CapCut, a video editing app loved for its simplicity and flexibility. With CapCut, removing a green screen is straightforward. It’s perfect for beginners who want to create eye-catching videos and more experienced editors who want a hassle-free option for green screen removal. That said, if you're looking for a faster and even more effortless way to remove green screens or backgrounds, there’s a fantastic alternative to find out! Lastly, you’ll have all the tips and tricks to remove green screens effortlessly, no matter which tool you choose. Let’s dive in and get started!
Contents:
Part 1. How to Remove Green Screen in CapCut on PC
Green screen removers like CapCut on PC allows you to remove the green screen from your videos, which is a simple yet powerful technique. CapCut's green screen features allow you to replace the background with any image or video you desire, whether it's for a professional setting, as well as for creative social media content, or simply for experimentation. The best part? It's a breeze for those who are just starting to edit videos. Using CapCut on a PC, you can eliminate the green screen and follow these instructions on how to remove green screen in CapCut PC.
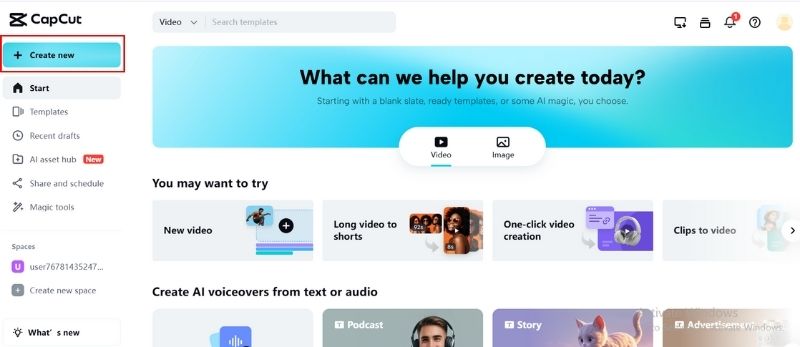
Step 1. Open CapCut on your PC, create a new project and select the blank canvas.
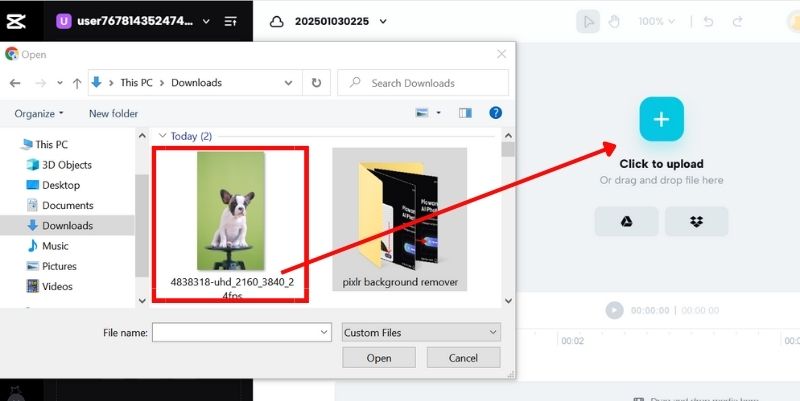
Step 2. Upload the image or video you want to use and hit Click to Upload. Then, drag the background file to the timeline's track below your green screen video. It will ensure that it appears behind your subject.
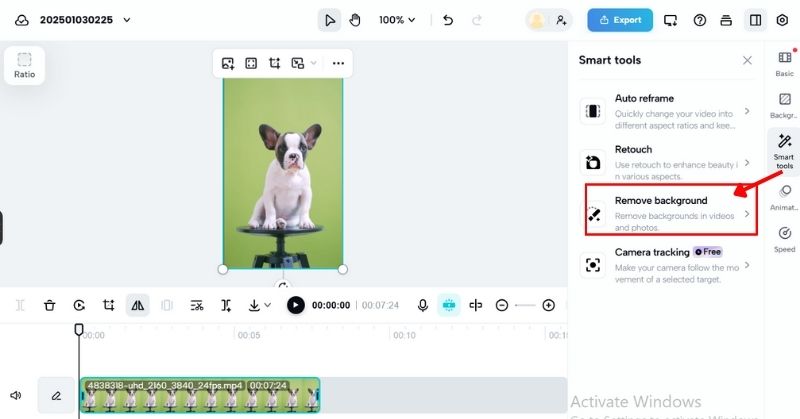
Step 3. Click on your green screen video clip in the timeline to highlight it. On the right side of the screen, find the Smart tool section and select the Remove Background tool.
Step 4. Adjust the Intensity slider to ensure it removes the green background without affecting your subject. Then, Click Auto Removal to remove the green screen background on your video.
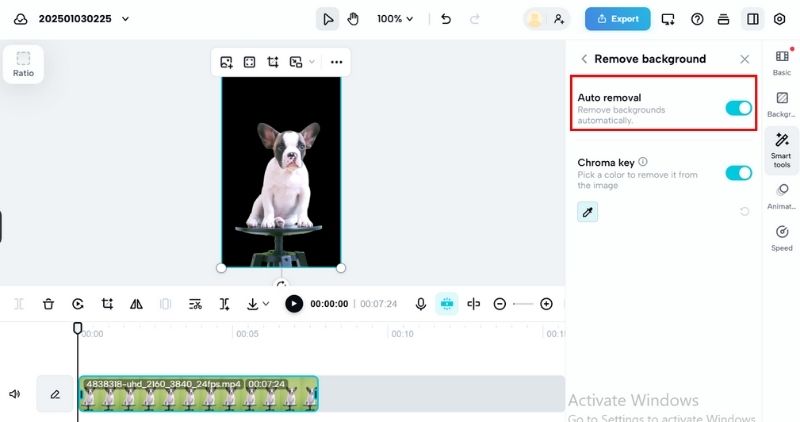
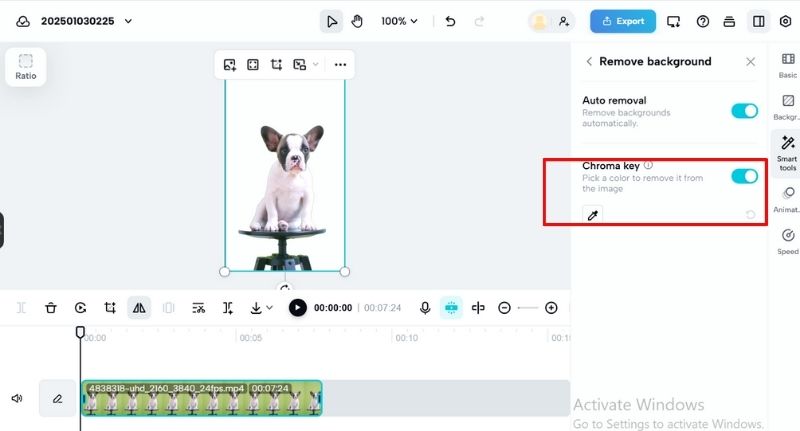
Step 5. If there are any rough or uneven edges around your subject, go to the Chroma Key menu to smooth things out. Play your video to make sure everything looks seamless.
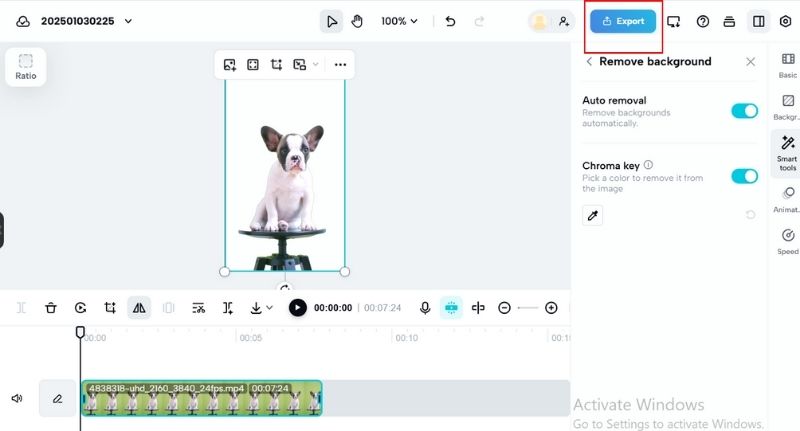
Step 6. Click the Export button in the top-right corner of the screen. Choose your preferred resolution and file format, then save your video to your computer.
And that's it! With just a few clicks, you can replace the green screen in your video with any background image. It's simple to use CapCut on PC to process and edit for any creative scene, commercial setting, or anything you can think of.
Part 2. Remove the Green Screen in CapCut on the Mobile Phone
Using CapCut on your mobile phone, you can quickly and easily remove a green screen for editing. The app's features, which include replacing a green background with supplementary images or videos, can be used to create TikToks, Instagram videos, and personal projects. It's easy to get started, and you don't have to be a professional to see great results.
Steps on How to Remove Green Screen in CapCut Mobile
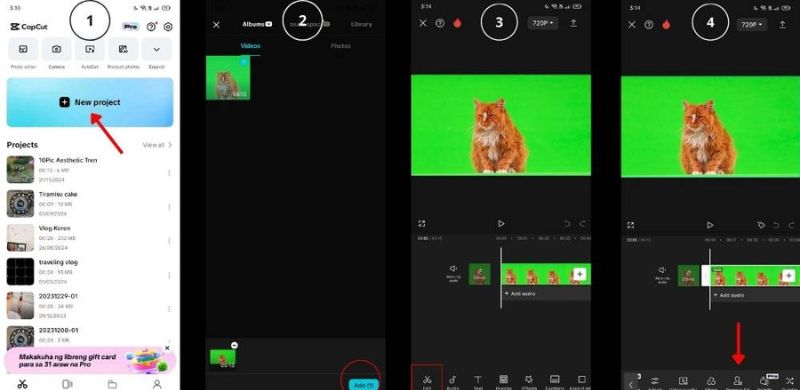
Step 1. Launch the CapCut app on your phone and tap on New Project.
Step 2. Select the video with the green screen background from your gallery and add it to your timeline.
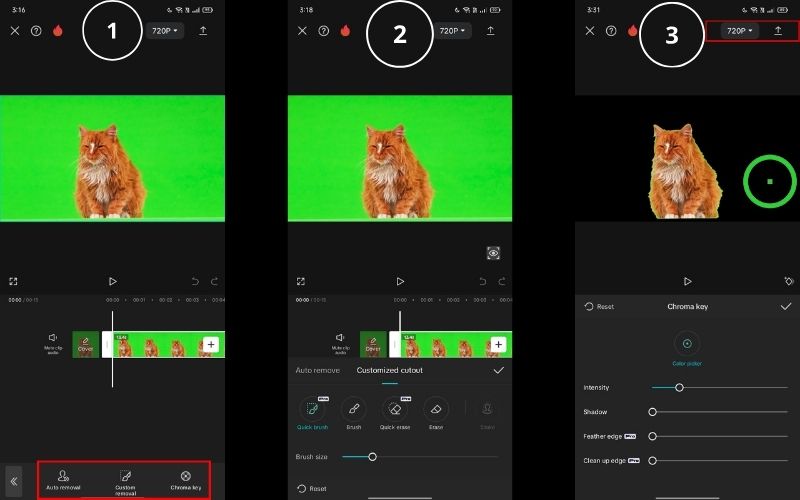
Step 3. Click on your green screen video in the timeline to highlight it. Find the Edit menu, scroll until you find the Remove Background, and select the Auto Removal button.
Step 4. Another option is to go through Chroma Key, where you can erase the green area in your video.
Step 5. Preview the video to ensure everything looks clean and polished. Once you’re happy with your new video, click the Export button at the top of the screen. Choose your preferred resolution and save the final video to your phone.
Removing a green screen in CapCut on your phone is super simple and convenient. It’s a great option for making quick edits while you’re out and about, and the results can be impressive. With just a few steps, you can easily replace the background and turn your videos into something visually striking—all from the comfort of your phone.
Part 3. Best Alternative to Remove Green Screen
If you’re looking for a simpler and faster way to remove green screens, especially from images, Picwand AI Photo Cutout is a great alternative. This easy-to-use tool uses AI to automatically remove backgrounds in seconds, making it perfect for people who want quick, professional-looking results without much effort.
Main Features
• No complicated steps, and it is perfect for anyone to use.
• Removes the green screen in seconds with minimal effort.
• Works well for images and simple designs.
• Use it on a PC or mobile device, online, or via the app.
Steps to Remove Green Screen with Picwand AI Photo Cutout
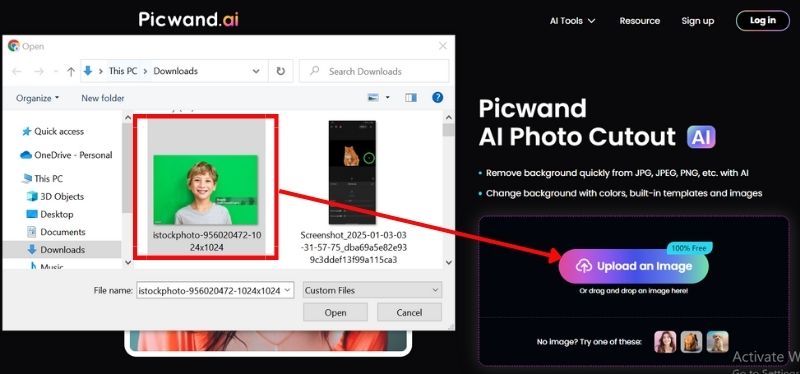
Step 1. Visit the Picwand AI Photo Cutout on your PC. Click Upload an Image and choose the image or video with the green screen you want to edit.
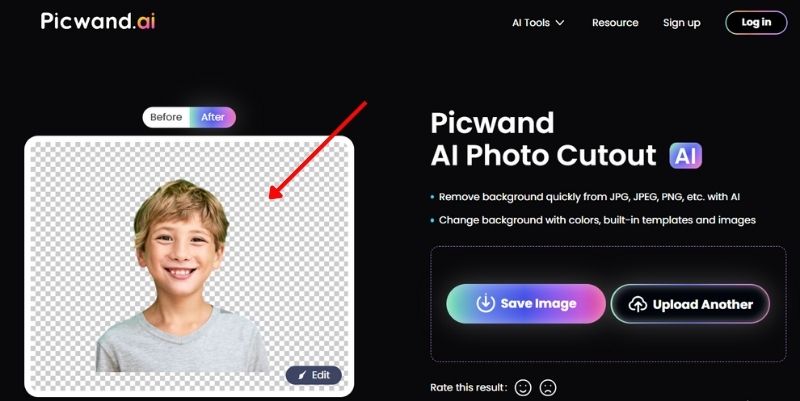
Step 2. Our tool will automatically remove the green screen. Your image will then have a clean, transparent background.
Step 3. You can adjust the edges, make small fixes, or even add a new background by uploading an image or selecting a color. (optional)
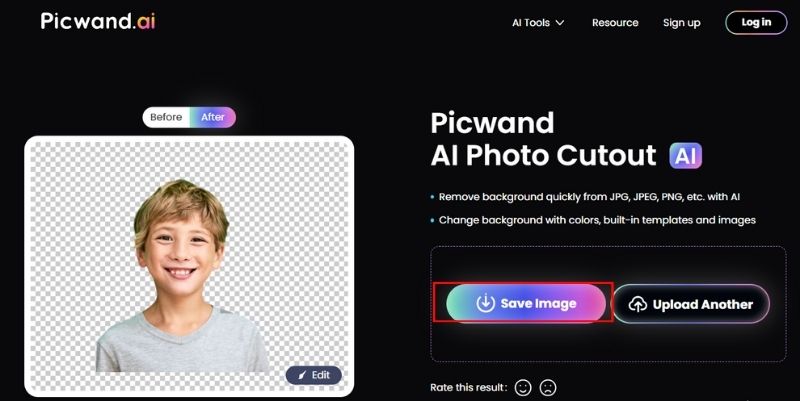
Step 4. Once everything looks good, click Save Image to download the edited file to your device.
If you want a fast and easy alternative to CapCut, Picwand AI Photo Cutout is a fantastic choice. It saves you time and effort while delivering great results! You can also use it to remove unwanted background
Part 4. FAQs about Remove Green Screen in CapCut
What happens if the green screen background is left in place?
If some green background is still visible, you can adjust the Intensity slider in the Chroma Key settings to control the amount of green that gets removed. Additionally, you can use tools like Feather or Shadow to refine the edges for a more polished look.
Can I remove a green screen in CapCut for videos longer than 10 minutes?
CapCut allows you to remove a green screen from videos longer than 10 minutes. The app supports videos of different lengths as long as they stay within limits. However, longer videos might require more processing time, especially when intricate edits like removing the green screen are applied.
What if CapCut doesn’t automatically remove all of the green background?
If CapCut doesn’t completely remove the green background, you can tweak the Saturation or Shadow settings in the Chroma Key tool. This adjustment will help refine the removal process and achieve a cleaner appearance.
Conclusion
We talk about how to remove green screen in CapCut mobile and PC. Whether you continue using CapCut or explore Picwand, you have some fantastic choices for green screen removal that can enhance your videos and images. Both tools provide remarkable outcomes without requiring advanced expertise, allowing you to concentrate more on the creative aspects of your projects.
AI Picwand - Anyone Can be A Magician