A Premiere Pro Guide: How to Remove Green Screen in Premiere Pro
Removing a green screen is widely used for creating seamless and professional-looking videos, particularly in filmmaking, YouTube content creation, and marketing. With Adobe Premiere Pro, this process becomes even more accurate and efficient. With the help of the robust video editing program Premiere Pro, you may swap out green screens for custom backgrounds, whether a lively video, an image, or something entirely imaginative. However, let’s be honest: while Premiere Pro provides amazing flexibility and control, it can be a bit daunting for beginners or those seeking a quicker solution. That’s where alternatives come into play. This analysis will teach you how to remove the green screen in Premiere Pro and an alternative solution for those who prefer a more straightforward method. this article has everything you need!
Contents:
Part 1. How to Remove Green Screen in Premiere Pro
Adobe Premiere Pro is a top-notch video editing tool with features that enable you to produce professional-quality content. One of its most impressive capabilities is the removal of green screens, commonly called chroma keying. This technique lets you swap out a green background for anything you desire: a video, an image, or even an animation. While it may seem daunting, removing a green screen in Premiere Pro is quite simple once you familiarize yourself with it. Here’s an easy, step-by-step guide to walk you through the process, perfect for beginners.
Steps to Remove Green Screen in Premiere Pro
Step 1. Begin by launching Premiere Pro and creating a new project.
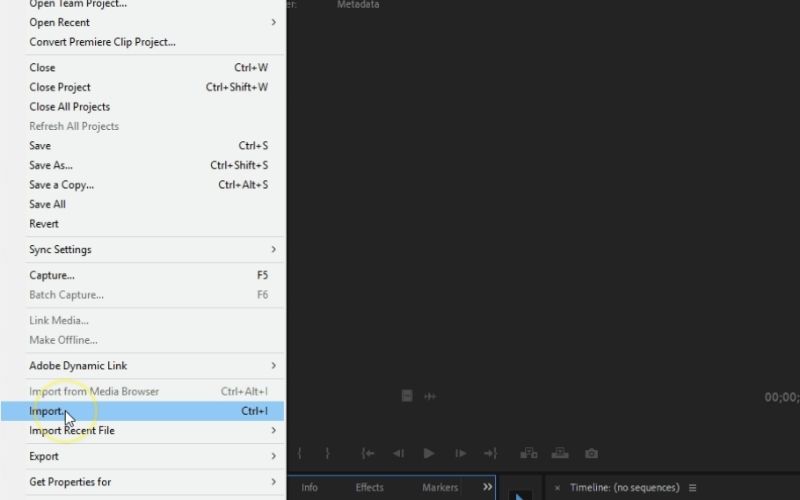
Step 2. Import your green screen video by dragging it into the Media Bin or navigating to File, then Import and select your file.
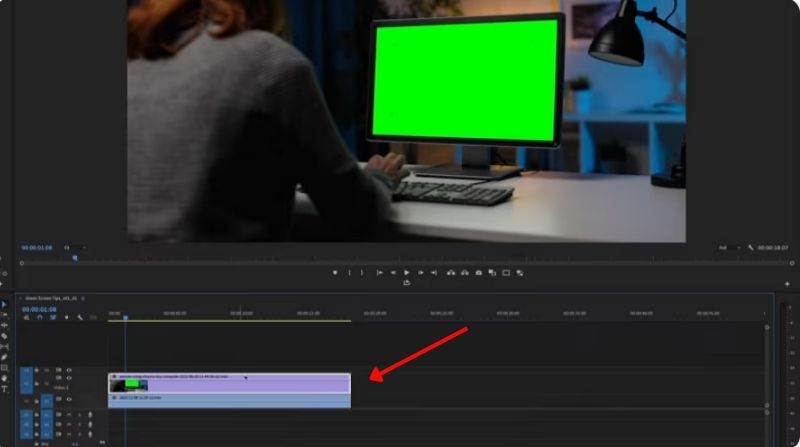
Step 3. Position the background layer on the timeline directly beneath your green screen footage.
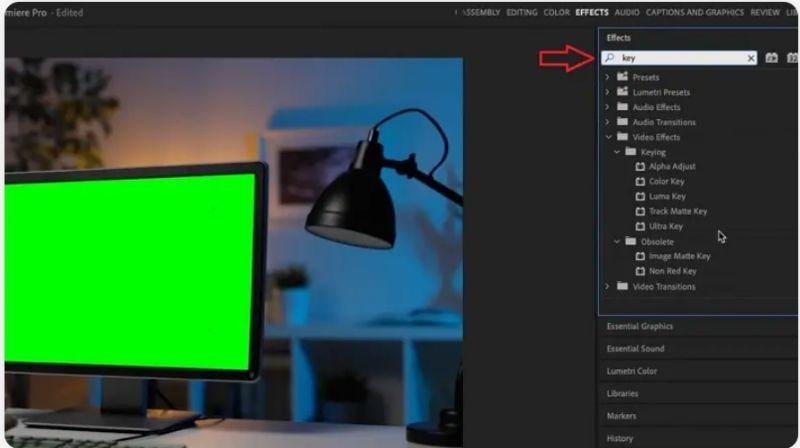
Step 4. Open the Effects panel, typically located on the right side. Type Ultra Key into the search bar, then drag the Ultra Key effect onto your green screen clip in the timeline.
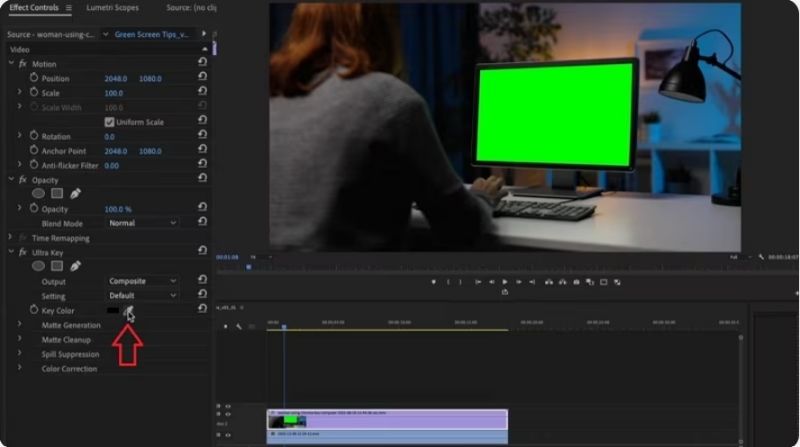
Step 5. Select your green screen clip in the timeline. Open the Effect Controls panel at the top left of the workspace. In the Ultra Key settings, locate the Key Color option and click the Eyedropper Tool. Use the eyedropper to click on the green area in your video, which will instantly remove the green screen.
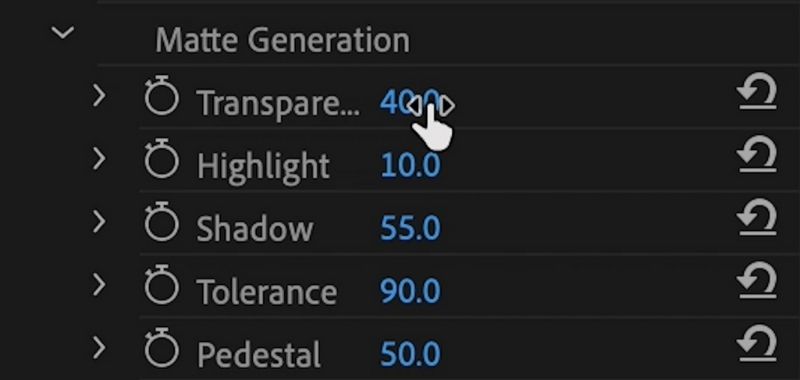
Step 6. If you see any remaining green or rough edges, tweak the Matte Generation settings, such as Tolerance and Pedestal, to improve the appearance. If there's a green spill on your subject, adjust the Spill Suppression settings to eliminate it.
Step 7. Play your video to check how everything looks together. Adjust the settings further to achieve a clean, polished result if necessary.
Step 8. Once satisfied with the outcome, go to File and select Export and Media to save your video. To finish the process, choose the preferred format and resolution, then click Export.
How to Remove Background in Premiere Pro without Green Screen
Step 1. Drag your video file into the Media Bin to import it. Once imported, you can drag the video onto the timeline to begin editing.
Step 2. To create a copy of your video layer, right-click on it in the timeline and select Duplicate. Make sure to place the duplicate layer directly above the original.
Step 3. Select the top video layer and navigate to the Effect Controls panel. In the Opacity section, click the Pen Tool. Using the Pen Tool, draw a mask around your subject, adjusting the points to match the outline closely.
Step 4. In the Mask Settings, tweak the Feather option to soften the edges. You can also use the Mask Expansion slider to adjust the area included in the mask. If your subject moves, enable Mask Path Keyframes to animate the mask frame by frame for accurate tracking.
Step 5. Import the new background you wish to use, whether an image or video. Drag it onto the timeline below the masked video layer. Then, resize or reposition the background to fit your composition.
Step 6. Play the video to check if the masked subject blends well with the new background. If you spot any glitches or rough edges, refine the mask or adjust the feathering for a smoother transition.
Step 7. When satisfied with your work, go to File and Export, then select Media to save your final project.
With these steps, you can effortlessly remove green screens and swap them out for custom backgrounds in Premiere Pro. It may take some practice to get the hang of it, but this tool gives you full control and allows you to create high-quality, professional-looking videos.
Part 2. Best Alternative to Remove Green Screen
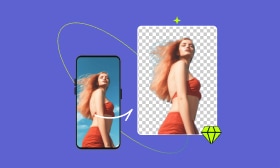
If Premiere Pro seems too complicated or takes too long, Picwand AI Photo Cutout is a fantastic alternative. This user-friendly, AI-driven tool focuses on effortlessly removing backgrounds, including green screens. Picwand is ideal for beginners or anyone seeking a fast and straightforward solution, particularly for image editing or simple video projects.
Why Choose Picwand AI Photo Cutout?
• It makes removing green screens easy in seconds, perfect for those without editing skills.
• The AI delivers sharp cutouts with very little effort from you.
• You can add new backgrounds, modify colors, or refine edges right within the app.
• It is available on both desktop and mobile, allowing you to edit while moving.
Steps to Remove Green Screen with Picwand AI Photo Cutout
Step 1. Open Picwand on your browser or mobile app. Click the Upload an Image button and select the file (image or video) with the green screen you want to remove.

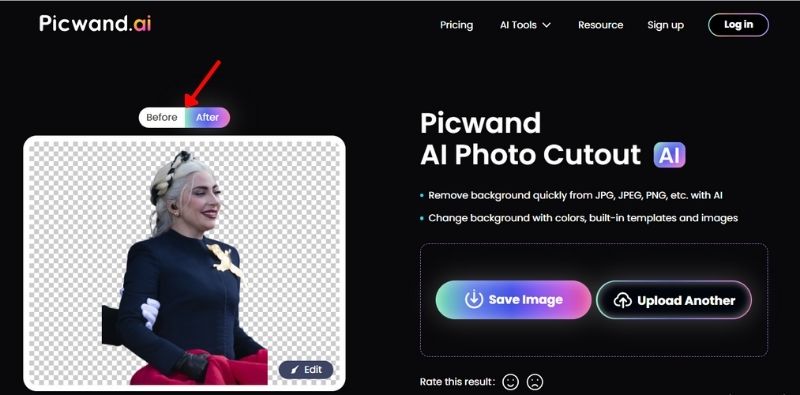
Step 2. After uploading, it will quickly detect and remove the green background in just a few seconds. You can preview the result to see how clean the cutout looks.
Step 3. Once the green screen is gone, if necessary, just click the Edit button to smooth out the edges for a more polished look.
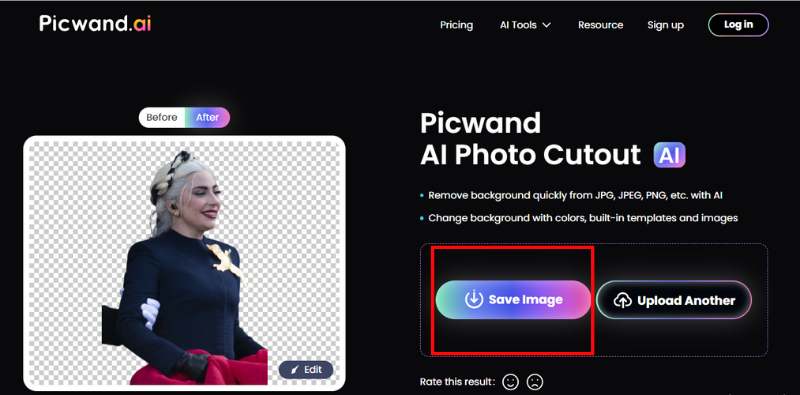
Step 4. If satisfied, click the Save Image button to save your file.
Picwand AI Photo Cutout is a great green screen remover for anyone looking for a simple and efficient method to remove green screens without getting into complicated editing software. It’s user-friendly, dependable, and suitable for personal and professional projects.
Part 3. FAQs about How to Remove Green Screen in Premiere Pro
Can the lighting eliminate a green screen in Premiere Pro if the lighting isn't ideal?
Yes, you can remove the green screen even if the lighting isn’t perfect, but it may be more difficult. Tweaking the Matte Generation and Spill Suppression settings in the Ultra Key effect can help address any unevenness. However, for the best results, you should shoot with consistent lighting.
What if the subject’s clothing has green tones?
Some areas might be removed during the keying process if the subject's clothing features green tones. To address this, consider adjusting the Tolerance and Pedestal settings in the Ultra Key effect. In certain situations, you may need to use masking tools to protect the impacted areas.
Can Premiere Pro eliminate backgrounds that aren't green?
Yes, Premiere Pro can remove backgrounds of other colors besides green. The Ultra Key effect can work with any solid color, including blue. Simply use the Eyedropper Tool to choose the color you wish to remove. Green is often favored because it strongly contrasts most subjects, and cameras tend to capture it more effectively.
Conclusion
Knowing how to remove background in Premiere Pro without green screen is an effective way to enhance your videos. Premiere Pro provides all the tools necessary for achieving outstanding results, which is why it’s a favored option among video editors. If Premiere Pro is daunting or you prefer a simpler method, Picwand AI Photo Cutout is a great alternative. Whether you prefer the advanced features of Premiere Pro or the simplicity of Picwand, both tools can help you create professional-quality results. The final choice really depends on your expertise and the needs of your project, but either way, you’ll be able to produce impressive and engaging content.
AI Picwand - Anyone Can be A Magician