Easy Ways to Remove Background From Image PowerPoint
Have you ever been completely captivated by a presentation with images that seem to leap off the screen? You can enhance the image's clarity and composition by focusing on a single element. The great news is that PowerPoint makes background removal easy with a useful feature. This article will give a deep explanation of each step on how to remove background from pictures in PowerPoint regardless of your experience level. We will cover how to select your subject, remove the background, and adjust the image to meet your needs. Let's dive in and learn how to elevate your presentations with this simple but impactful technique.
Contents:
Part 1. Remove Background from Image in PowerPoint
Getting the background from image PowerPoint is easy, thanks to some handy tools that let you adjust and control things just how you like. Whether you need a quick fix or something more detailed, PowerPoint has covered you with many options. The set transparent color tool, the remove background tool, and the fill tool let you get creative by swapping out background areas with solid colors or patterns. Here, we'll show you how to use these tools like a pro in PowerPoint. Here are the steps to make a picture transparent in PowerPoint with three tools.
Method 1. Set Transparent Color Tool
One of the easiest methods for removing backgrounds in PowerPoint is through the Set Transparent Color tool. This feature lets you choose a color in your image and make it see-through, removing it from the background and useful when your image background is solid and uniform. However, some tweaking might be necessary if the background is more intricate or features multiple colors. In this guide, we will talk about the procedure to remove the background from an image using the Transparent Color tool.
Step 1. Simply upload the image to PowerPoint and select it by clicking on it.
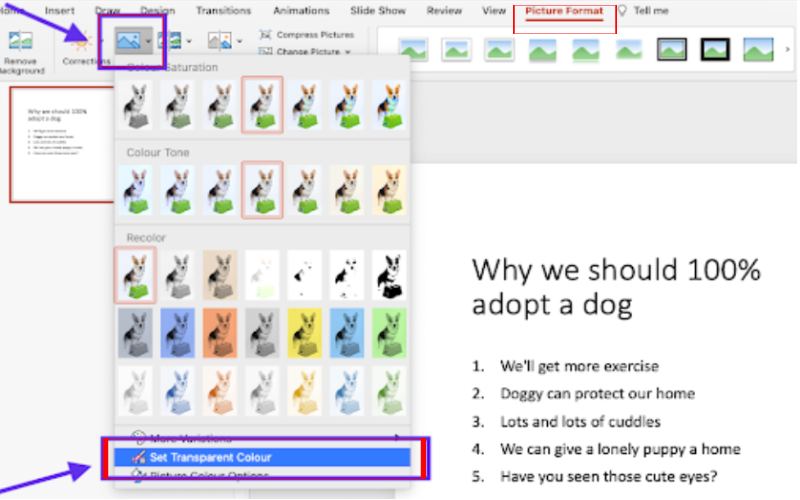
Step 2. Next, go to the Picture Format tab. Under the Color tab, select the Color dropdown. At the bottom, you'll see an option labeled Set Transparent Color. Click on this.
Step 3. Then, choose the background color of the image you wish to remove. That's it! It will remove the picture's background, allowing you to create your presentation.
Method 2. Remove Background Tool
The Remove Background tool in PowerPoint is a handy feature that lets you quickly eliminate any unwanted backgrounds in pictures. It's super useful if you want to focus on the main thing in an image or make your presentation look tidier and more polished. Unlike other ways that might need complicated software, PowerPoint's Remove Background tool makes things easy with a user-friendly interface, so even people who aren't that tech-savvy can use it. Here are the steps to PowerPoint removing background.
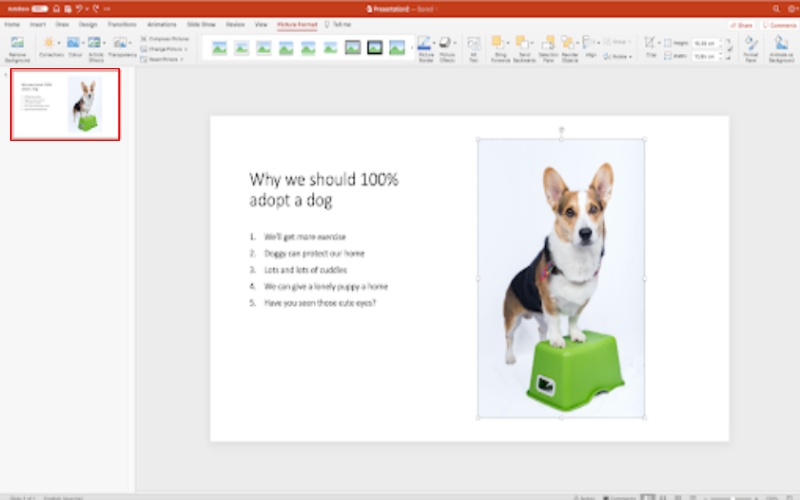
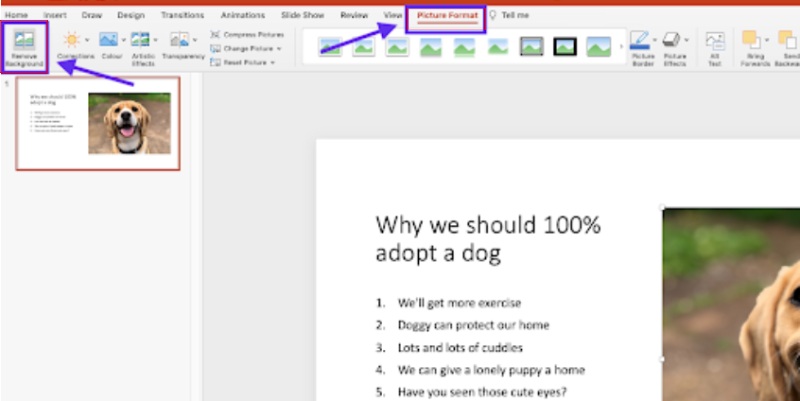
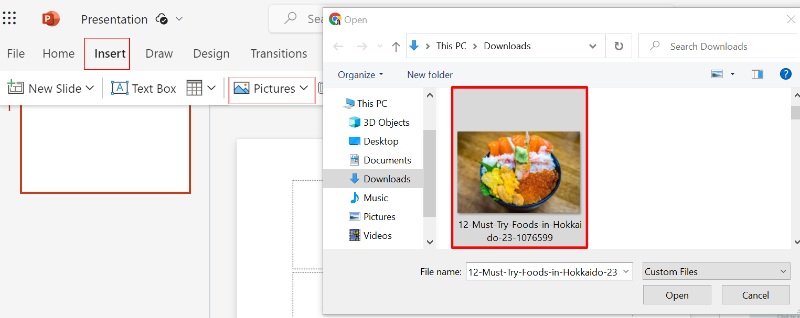
Step 1. Open up your PowerPoint and find the slide to which you want to add the picture.Head over to the Insert tab, click on Pictures, and pick the picture you want to use. Click the image to select it. It will open the Picture Format tab.
Step 2. In the Picture Format tab, click on Remove Background. PowerPoint will figure out where the background is and mark it in purple.
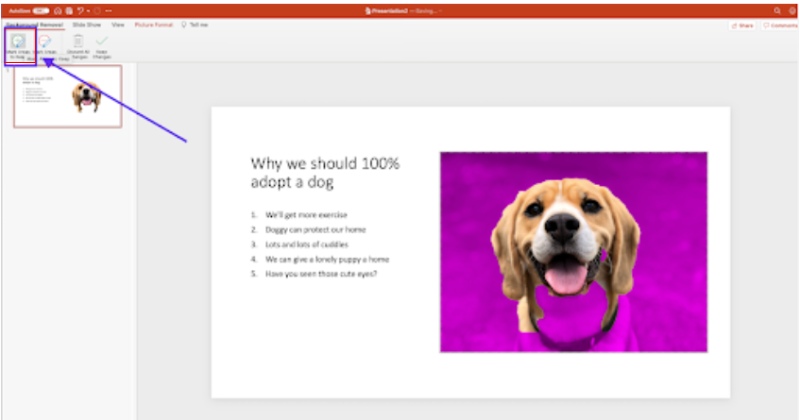
Step 3. Use the buttons to mark the parts you want to keep or eliminate to ensure you pick the right spots. Click on the parts of the picture you want to keep or remove to help the tool pick them up better.
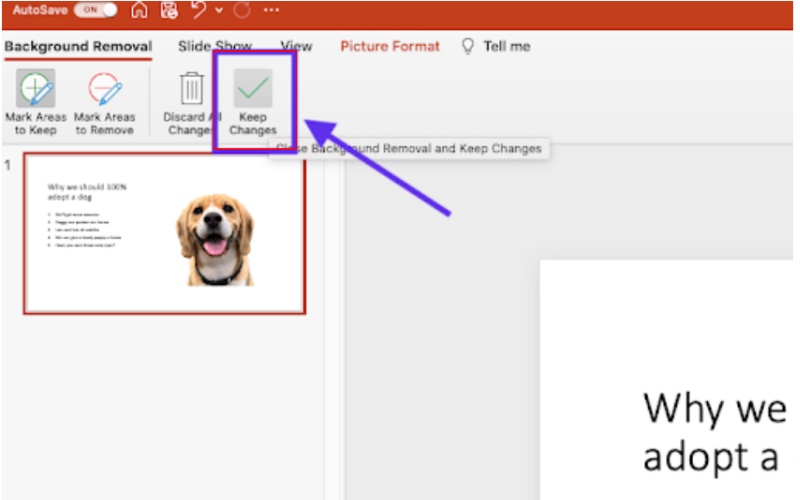
Step 4. Click Keep Changes to remove the background. If you're not happy, click Discard All Changes and try again.
Method 3. Fill Tool
The Fill Tool in PowerPoint is a handy feature that lets you switch out or swap the background of a shape or picture with a different color, texture, pattern, or even another picture. It's super useful when you need to keep the shape of something but want to change its background or fill it to fit your presentation's look better. You can get creative with the Fill Tool to make your slides look more appealing, making it a great tool in your PowerPoint kit. Here is how to remove white background from images in PowerPoint.
Step 1. Open your PowerPoint and select Insert, then Pictures. Choose the image from which you want to remove the background.
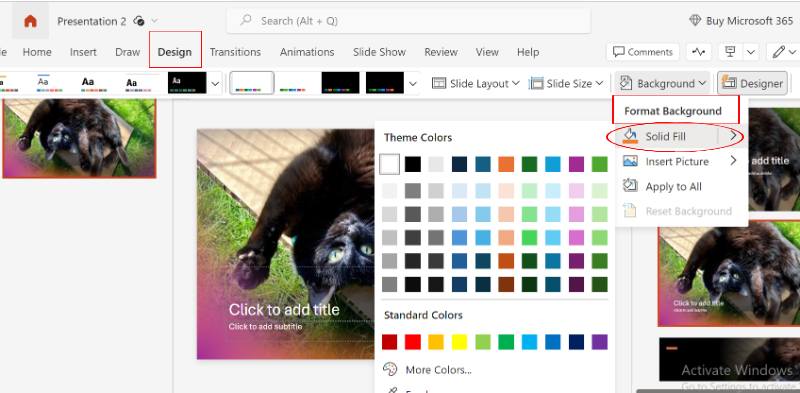
Step 2. Go to the Design tab and select the Background. You may choose the Solid Fill to apply one color.
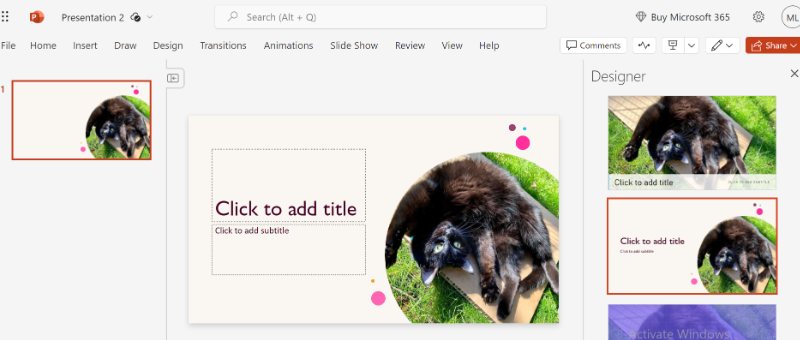
Step 3. After you've decided on your fill type and made any tweaks you need, the changes will happen automatically to your shape or picture. You can tweak the fill even more by changing the transparency, rotating it, or making it bigger or smaller to match your design.
Part 2. The best Alternative to PowerPoint Removing Image Background
PowerPoint has basic tools like the Set Transparent Color Tool, Remove Background Tool, and Fill Tool for removing image backgrounds, but these tools are sometimes great. For instance, the Remove Background Tool might mess up complex images, leaving behind weird bits or making you do a lot of work by hand. Plus, PowerPoint can't match up to fancy image editing software for getting background removal right, especially with detailed or complex pictures. With these problems and getting background removal done more accurately and easily, it might be a good idea to look into a different tool for this job. One tool that stands out is Picwand AI Photo Cutout, which has cool features that make background removal smooth and easy. Picwand AI Photo Cutout is a cool online tool that uses smart computer programs to quickly and accurately cut out backgrounds from pictures. It's different from the simple tools you find in PowerPoint because it deals with tricky backgrounds without any trouble, giving you great results that only need a little editing by hand. It's the perfect tool for people who want to make professional-looking pictures without the headache of editing.
Main Features
• Quickly spots and gets rid of backgrounds in photos with accuracy.
• Easy-peasy-peasy layout, so you can get it even if you're not a tech whiz.
• Gives you clean and clear cutouts, perfect for work stuff like presentations, ads, and more.
• It can handle all image files, so you're not stuck with one format.
• Clears backgrounds in no time, which means you save both time and effort.
How to Use Picwand AI Photo Cutout:
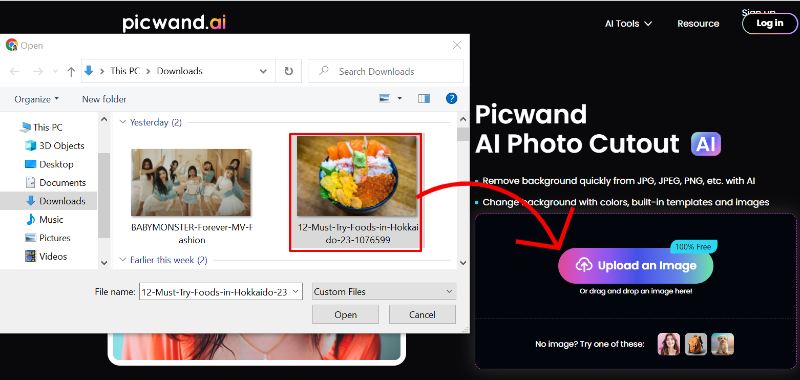
Step 1. Go to the Picwand website and click the Upload an Image button to select the photo you want to remove from your device.
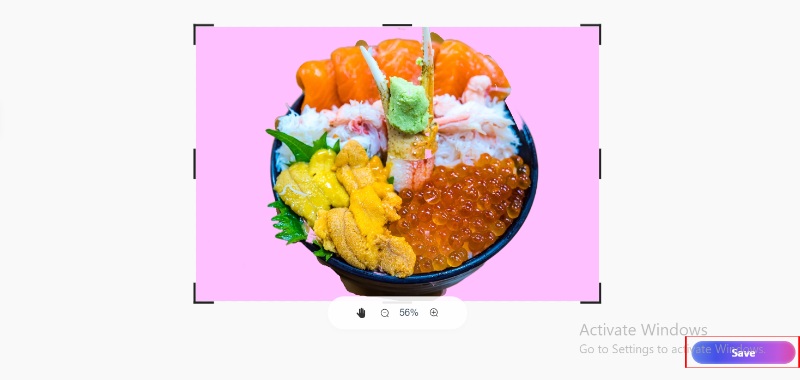
Step 2. Once you've uploaded your picture, Picwand's AI will automatically spot and remove the background, leaving you with a clear cutout of your subject. You can then review the results and use the editing tools to tweak the edges or make any other necessary changes.
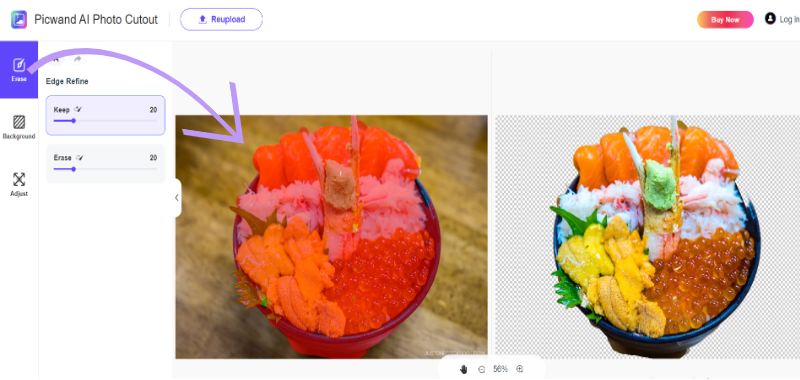
Step 3. After editing the new photo, click the Save button and check it on your files.
Part 3. FAQs on How to Remove Background From Picture in PowerPoint
How do I erase part of an image in PowerPoint?
To delete a section of an image in PowerPoint, you can choose from three methods: Remove Background Tool: Select the image, choose Remove Background, adjust the selection, and apply the changes. Crop Tool: Insert the image, select it, and use Crop to cut out unwanted parts. Adjust and apply. Shapes and Merge Options: Add a shape over the area to be deleted, select both, and use Merge Shapes to remove the covered part. These methods allow you to edit images directly in PowerPoint without additional software. Furthermore, you can also use PowerPoint to compress images.
Does PowerPoint support a transparent background?
Yes, PowerPoint allows you to create transparent backgrounds. Use the Set Transparent Color tool to make a color in an image see-through or the Remove Background tool to strip away the background, showing only the subject. Both tools work well for making transparent images in PowerPoint.
What is the shortcut for erasers in PowerPoint?
You can't find a quick way to erase something with an eraser tool in PowerPoint because PowerPoint comes with something other than one, as some photo editing apps do. If you're using the drawing tools, hitting Esc will quit drawing mode. You can undo your last move by hitting Ctrl + Z. To delete a line or shape you drew, select it and hit the Delete key.
Summary
In this talk, we looked at different ways to remove background from image PowerPoint, such as the Set Transparent Color Tool, Remove Background Tool, and Fill Tool. Each tool has features for various needs, from quick single-color transparency to detailed background removal. However, PowerPoint could be better for complex images due to its limitations. Picwand AI Image Cutout is a great choice for a better and more precise solution. It uses AI to offer a user-friendly experience with high precision for background removal, perfect for complex tasks. This tool is great for those looking for a reliable and easy way to get professional results without the drawbacks of PowerPoint.
AI Picwand - Anyone Can be A Magician