3 Quick Methods to Reduce Image Size on Mac Using Free Tools
Managing digital photos efficiently is essential for various purposes. On a Mac, reducing the size of a photo can save storage space and make sharing images online convenient. Fortunately, macOS offers built-in tools and third-party solutions designed to help users optimize images effectively. In this post, you will learn how to resize image size on Mac using various tools and techniques. These tools can help you reduce photo file sizes on your Mac without compromising their quality. Continue reading for more details!

Contents:
Part 1. How to Compress Photo on Mac Using an Online Tool
High-resolution photos can take up a significant amount of space on your hard drive. Compressing these high-quality images reduces their file sizes, freeing up more room for other files. If your storage capacity is somewhat limited, use Picwand Online Image Compressor to optimize your images. It is a highly regarded image optimizer for compressing large file sizes. It allows you to shrink image size on Mac without losing any details.
This tool also applies lossless compression techniques to optimize your images, ensuring they are well-compressed without compromising their original quality. On its straightforward interface, you can upload images in formats like JPG/JPEG, PNG, SVG, WebP, GIF, and more. Also, Picwand Online Image Compressor has simultaneous compression support. This means you can add up to 40 images and compress them at once.
Why Choose Picwand Online Image Compressor for Compressing Photos in Mac:
• Supports popular media formats like JPG/JPEG, PNG, WebP, etc.
• Effectively shrinks large file sizes while keeping their original quality.
• Simultaneous compression support, compressing up to 40 image files.
• Uses advanced AI lossless compression technology to maintain quality.
Here’s how to compress images on Mac using Picwand Online Image Compressor:
Step 1. Access Picwand Online Image Compressor's official website. The homepage features a straightforward interface.
Step 2. Click Upload Image(s) to import the photos you want to compress the size. As mentioned, you can add up to 40 images from your picture folder.
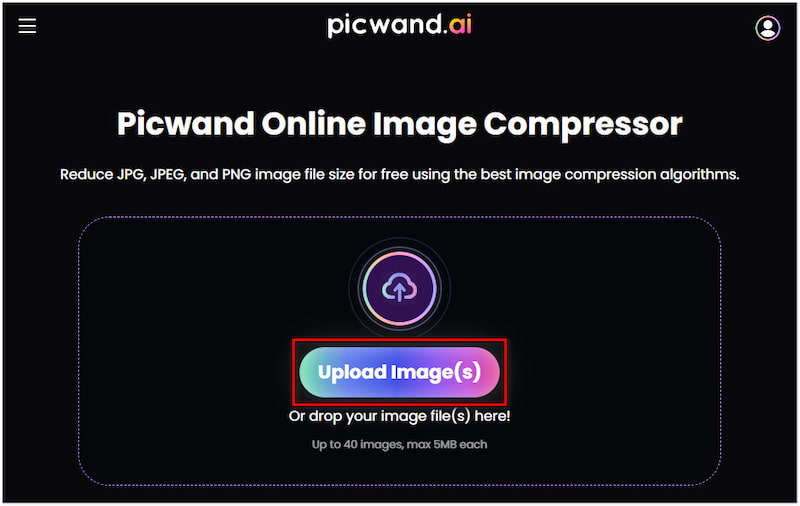
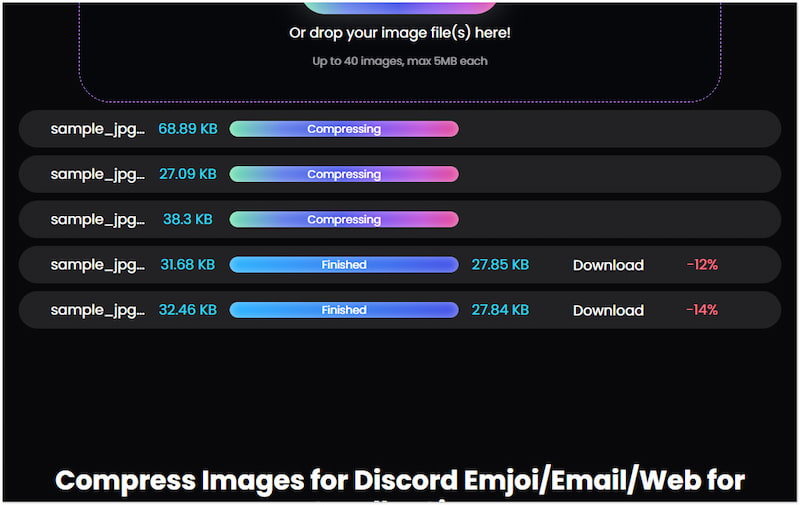
Step 3. Once your photos are added, Picwand Online Image Compressor will begin lossless compression. You should then sit back and wait for the process to finish.
Step 4. After completing the compression process, you can save the photos. Click Download All to download the ZIP folder containing the compressed photos on your Mac.
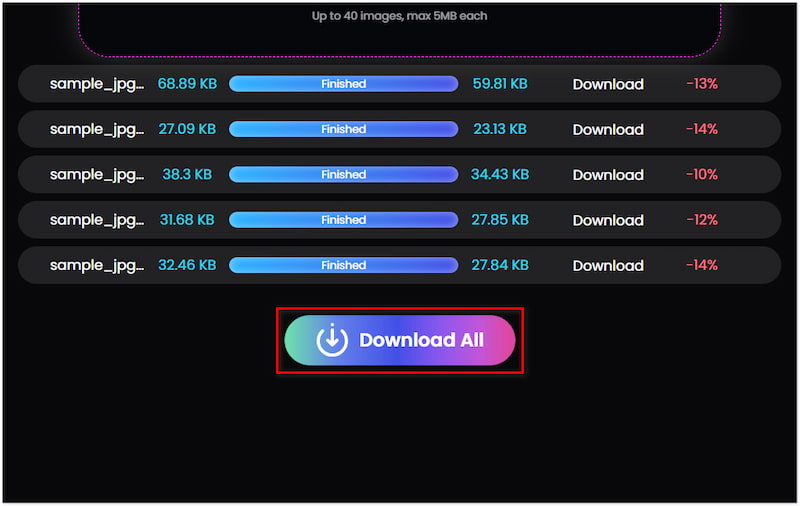
Picwand Online Image Compressor allows you to compress JPEG and other formats to manage your storage more efficiently. It ensures file sizes are shrinked by up to 90% while keeping the best quality, preventing you from running out of space for other image files.
Part 2. How to Compress Image in PowerPoint on Mac
A PowerPoint presentation that contains high-resolution photos can affect its performance. It can cause delays in loading and navigating through various slides. Making the file size smaller can result in faster loading times and mother transitions. Fortunately, PowerPoint includes a built-in compression tool to reduce JPG/JPEG file size. Users can remove cropped areas of pictures and choose different resolutions. Some of these are High (330 PPI), Print (220 PPI), Web (150 PPI), and Email (96 PPI).
Here’s how to reduce JPEG file size on Mac using PowerPoint:
Step 1. Insert the photo you want to reduce file size in PowerPoint.
Step 2. Click the photo to select it to bring up the Picture Format tab.
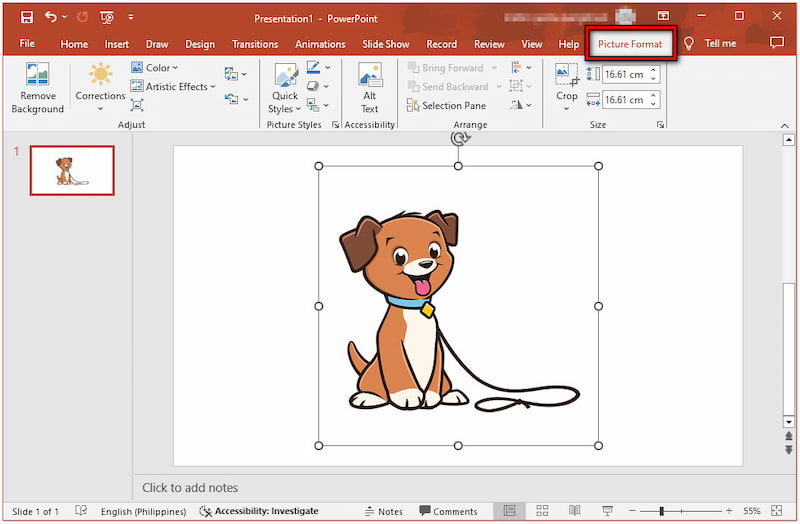
Step 3. Click the Adjust option to access the Compress Picture dialog box.

Step 4. In the Compress Picture dialog box, you will see several compression options:
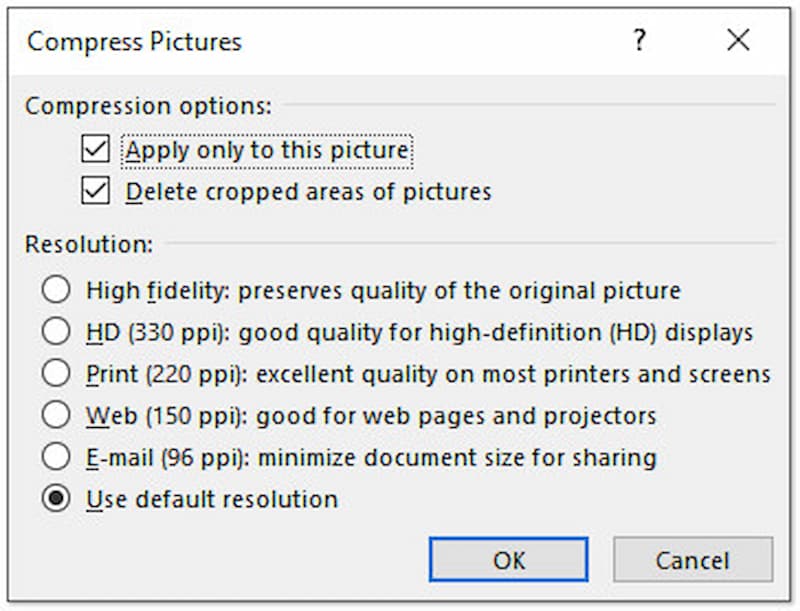
• High fidelity: Retains the highest quality but may not minimize the size.
• HD (330 ppi): Ideal for high-definition screens.
• Print (220 ppi): Best for printed documents with reasonable quality.
• Web (150 ppi): Perfect for online sharing, projectors, and web pages.
• Email (96 ppi): Suitable for sharing attachments and lowest file size.
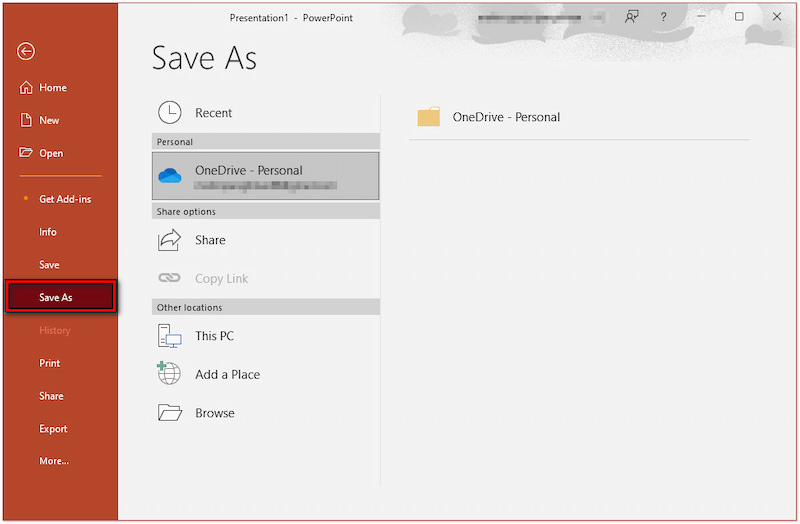
Step 5. After selecting the compression option, move to File and click the Save As option.
PowerPoint’s compression options are sufficient for those who work with photos in their presentations frequently. However, there’s a tiny catch. Opting for the Email (96 PPI) can significantly drop the quality of your photos. Although it can make your photos smaller, it might not be suitable for a presentation that requires professionalism.
Part 3. How to Compress Images in Mac With Preview App
Most email services impose restrictions on the size of attachments you can send. By compressing photos, you can ensure that your files stay within these size limits. For good measure, Mac provides a built-in application that you can use for this purpose. Preview is a highly popular application on Mac, offering extensive features for editing images. One of its lesser-known but particularly useful features is image compression. It can handle various image formats, such as TIFF, PSD, and PNG files.
Here’s how to compress a photo on Mac using Preview:
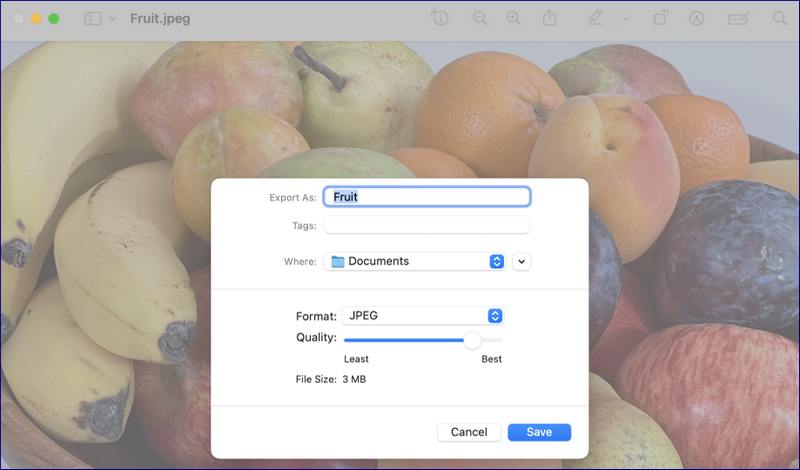
Step 1. Open the photo you want to compress in Preview.
Step 2. Go to Tools select Adjust Size, and enter a new panel.
Step 3. Drag the Quality slider to your preferred file size.
Tip: After saving the compressed photo, you can check its file size. Simply select the file in Finder and press Cmd+I to open the Info window.
Part 4. Tips on How to Make a File Size Smaller on Mac
Use Cloud Storage and Sync Only What You Need
Using cloud storage like iCloud can help you manage and reduce image size on macOS. Storing large files in the cloud enables you to free up space on your device. Usually, these services offer a selective sync option, enabling you to sync certain files and folders. This ensures your storage remains uncluttered and files are accessible from any device.
Reduce File Size by Changing the Format
Different image formats vary in size, even if they contain the same data. Converting files into a storage-efficient format can reduce their size. For instance, PNG files can be compressed by converting them into JPG/JPEG formats. This lower-quality picture format has smaller file sizes compared to other image files.
Make a File Smaller by Resizing the Photo
How can I reduce a file size on a Mac? Resizing a photo can reduce its file size on Mac. On macOS, you can use Preview to resize photos effortlessly. You can achieve this by changing the width and height of your photo to reduce its resolution. Also, incorporating resizing with format changes can reduce the overall size.
Part 5. FAQs about Reducing Image Size on Mac
How do I reduce the size of a picture on my Mac without losing quality?
Reducing the size of a picture on a Mac without losing quality is possible. Picwand Online Image Compressor allows you to reduce the file size while keeping the quality. As mentioned, it applies lossless compression techniques to ensure image quality won’t be affected.
How do I reduce the size of a photo in Mac Mail?
Reducing the size of a photo in Mac Mail is straightforward. Click the Attachment button in the toolbar to attach a photo to Mail. On the right side of the message header, click the dropdown menu. Choose between Actual Size, Large, Medium, or Small. Selecting the Small to Large options will reduce the size of the photo suitable for mail attachments.
What app compresses PNG files on a Mac?
One highly recommended option for compressing PNG files on Mac is Picwand Online Image Compressor. As mentioned, it supports various image formats, including PNG files. For this task, you can refer to the demonstration provided earlier.
Summary
Knowing how to reduce image size on Mac can benefit you in several ways. With the right tools and techniques, optimizing your photos efficiently manages your storage and sharing needs. Among the tools presented, Picwand Online Image Compressor stands out as a compelling solution for this purpose. It allows you to compress your photos without affecting their original quality. With it, you can ensure your photos keep their quality while occupying less space.
AI Picwand - Anyone Can be A Magician


